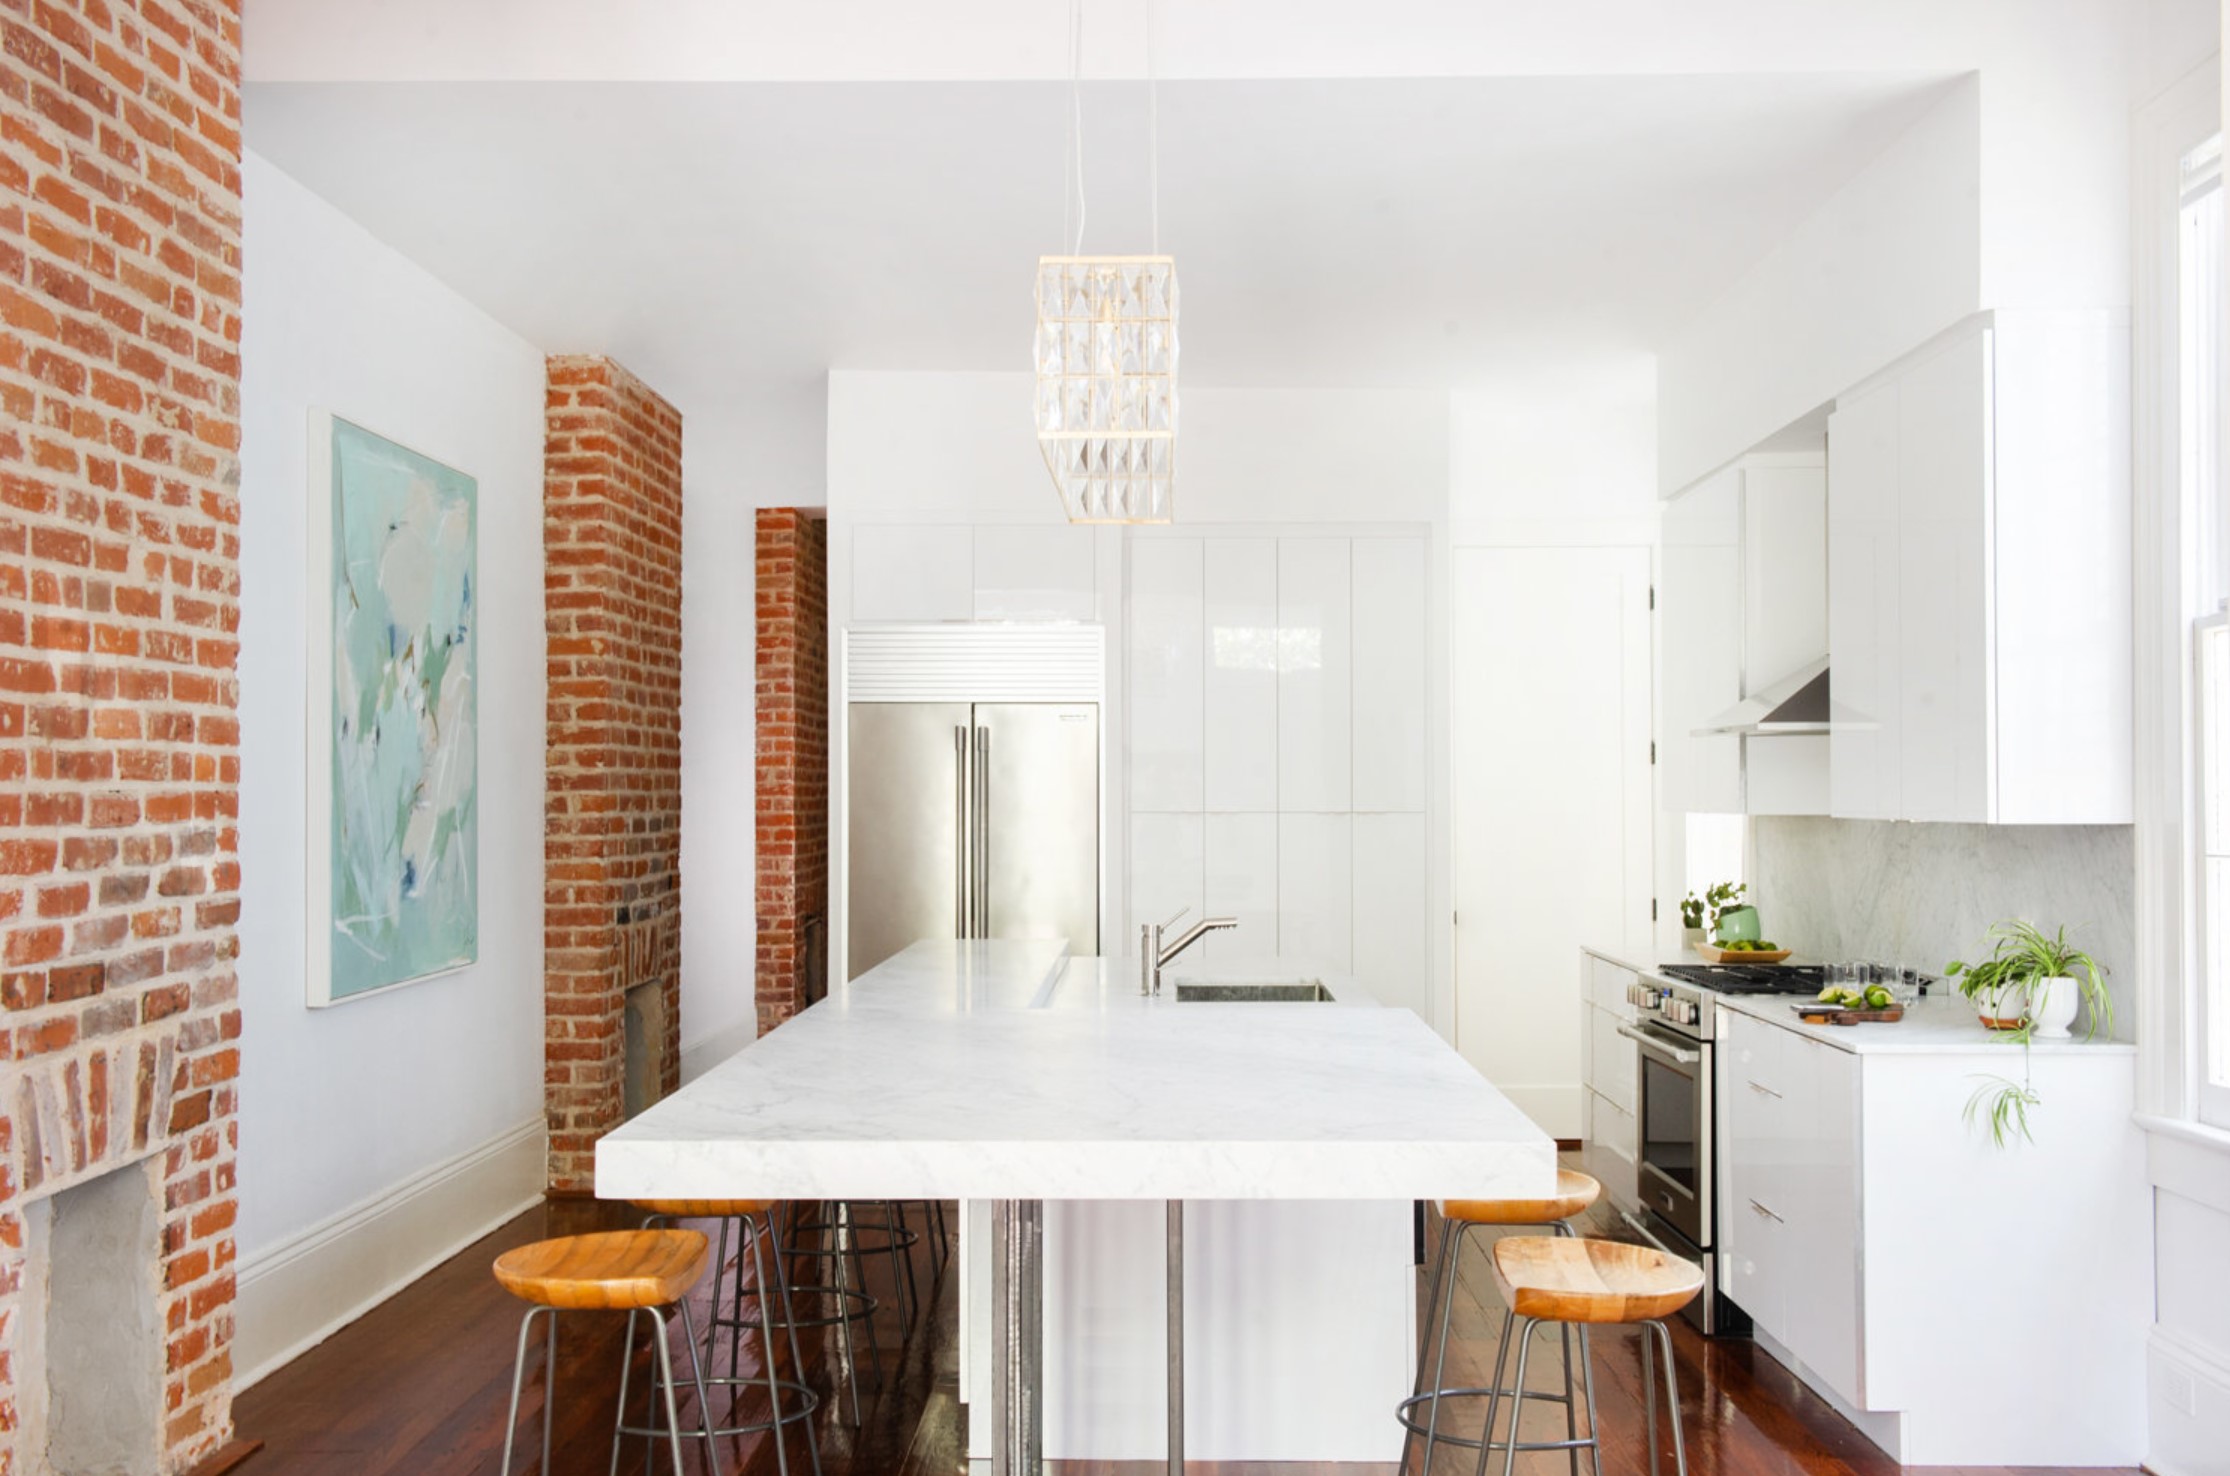
Must-Haves for Your Kitchen Design
September 22, 2022
You may have just bought your home or maybe you’re thinking of buying a new one. There’s a good chance that the first place you’re going to start is with the kitchen! Here are some fundamentals that I start with to get the function and style correct with any kitchen. Let’s dive right into the first topic.
Layout
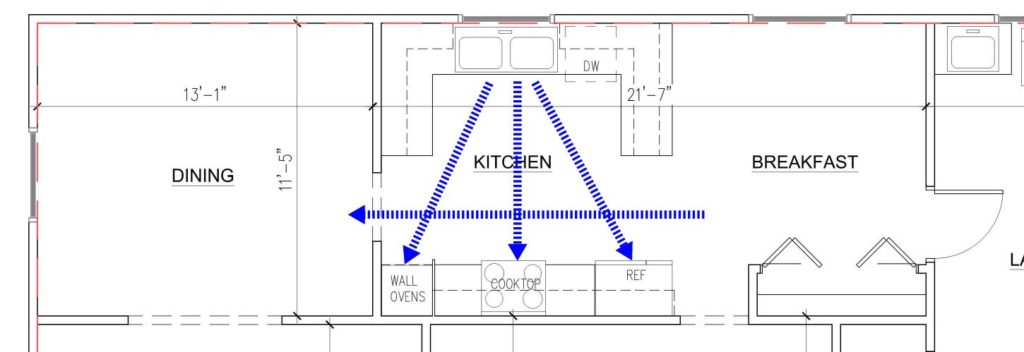
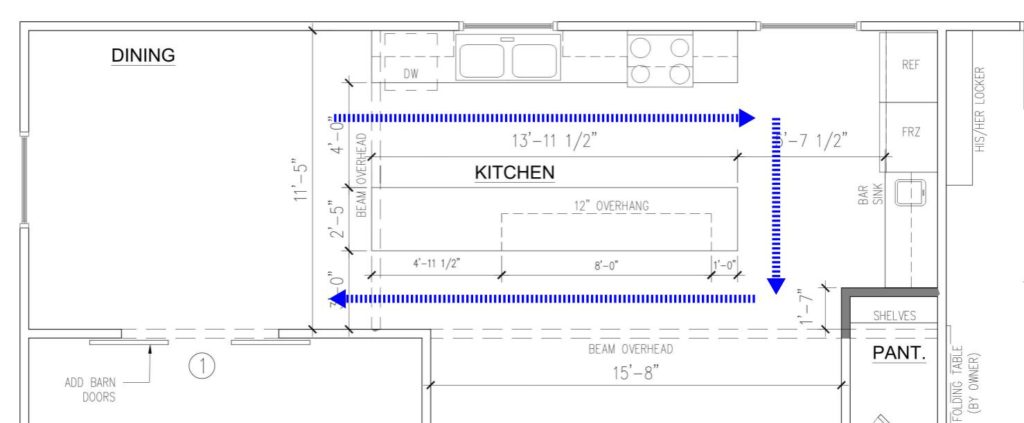
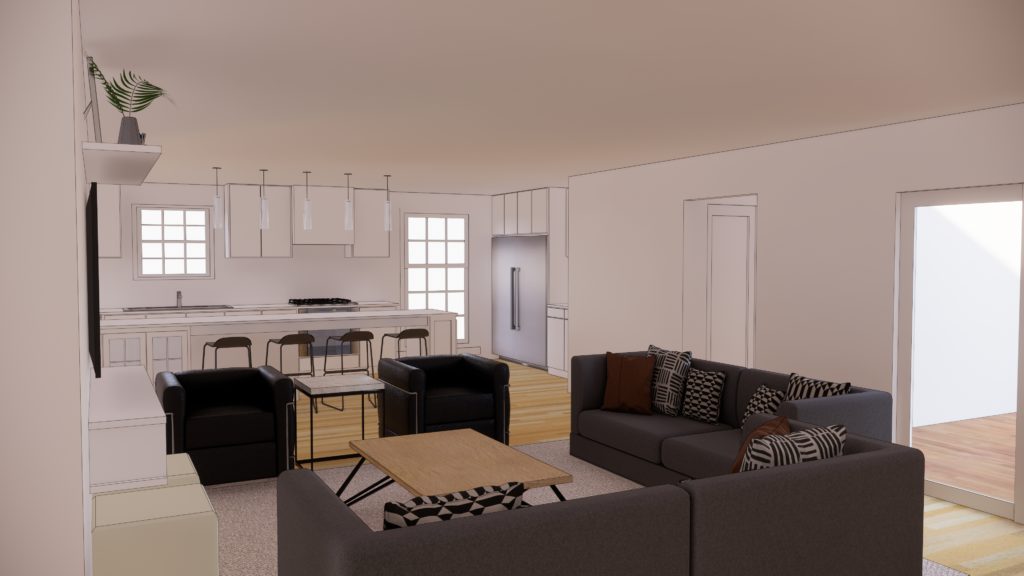
Layout is the first place we always start. Whether it’s mapping out existing conditions or starting from scratch we have to figure out the best way to utilize the wall space to provide the best storage, circulation, and function. The two biggest complaints I receive in home renovations are closet’s space (more on that in another post) and kitchen function! The biggest culprit of poor circulation is the kitchen peninsula. Most of my client’s complain they are always, “on top of another when using the kitchen.” When you look at this in plan, they are correct! The plans below show a home with this exact condition, and our proposed solution is placed beneath. You can see the benefit of circulation that comes from having an island vs. the large U-shaped cabinetry before. While the U-shape or peninsula layout will sometimes provide more kitchen cabinetry, it will corral everyone to one location hurting the function. As opposed to an island condition that will allow more of an assembly line workflow. There is a lot of dead space inside of these layouts and it’s why I often times do not recommend these for our clients. We can make an island wider allowing us to add cabinetry on both sides to compensate for the lost cabinetry above. This always proves to be a better compromise. Also, we’ve implemented double island plans that also allow for more cabinetry, while still keeping the linear circulation that comes from and island kitchen.
Island Sizing
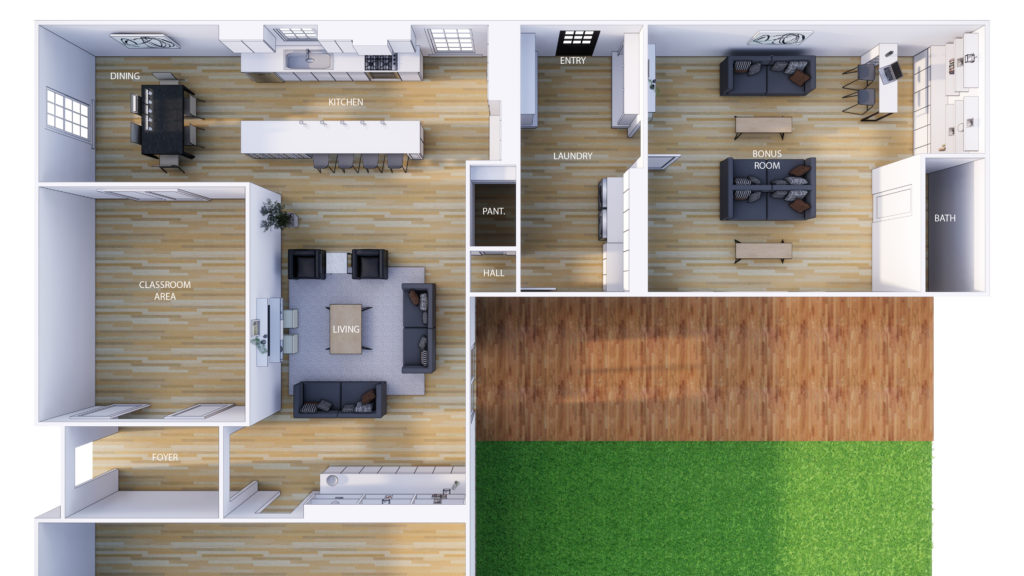
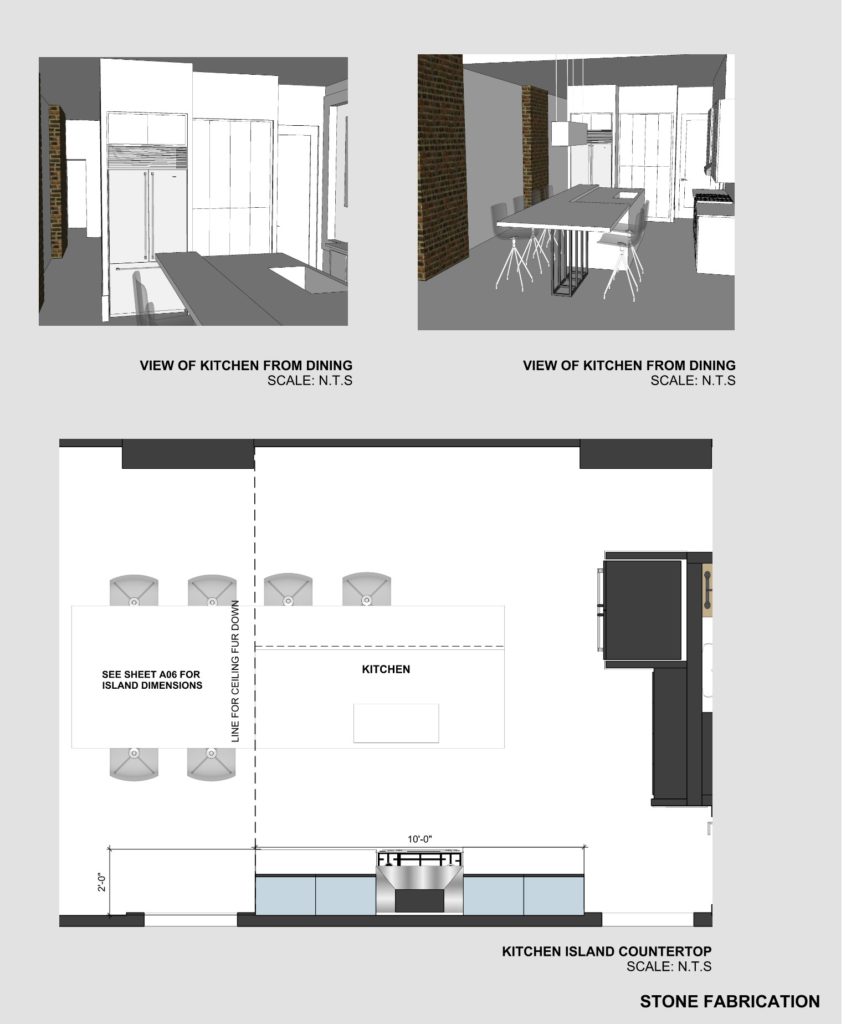
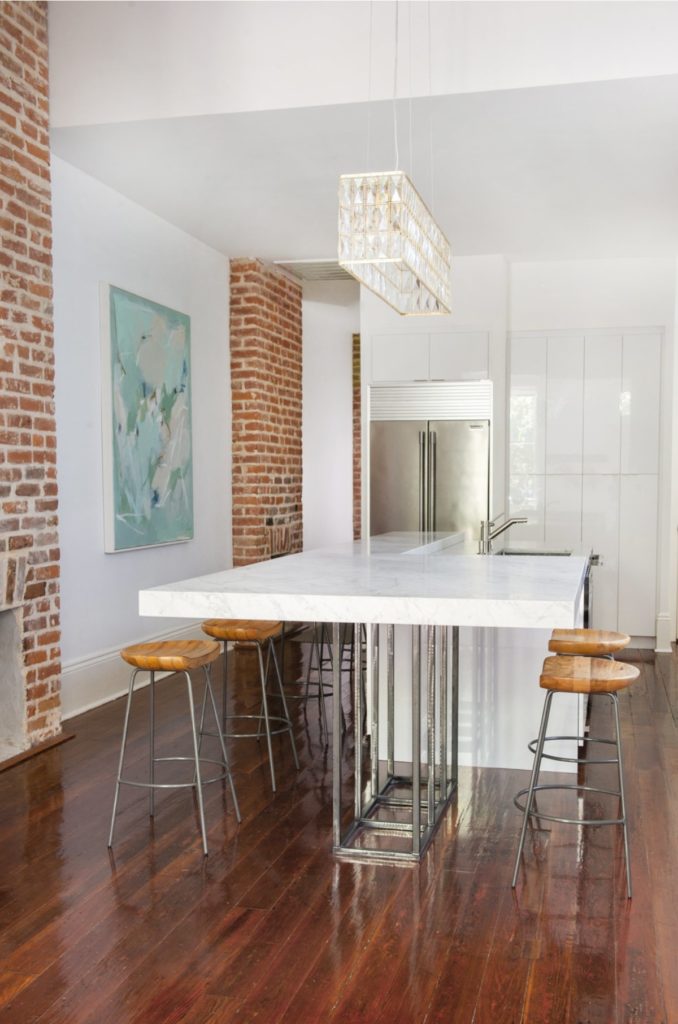
A great island dimension to start with is (8) feet wide. This always allows us to have a dishwasher, sink, and microwave while also providing seating for as many as (4) people, provided you use smaller bar stools. This typical island is (3) feet deep with (2) feet of cabinetry and (1) feet of overhang for the bar side. With this layout, most of your storage will be beneath your sink. However, you can also increase the depth of your island to (4) feet to provide another (1) feet of cabinetry facing your bar side should you need more storage. This was a strategy we used for our home, and we love it! We use it to store bathroom products, cleaning products, and extra towels. It’s a a great way to add storage for an old home with small bathrooms! Along with island dimensions, if you have an elongated plan, I recommend combining your island and dining. When we did this layout in 2018, we had a hard time finding any good examples. However, it’s been amazing, and it’s provided space saving solutions for us. The goal in our design was to utilize the same chairs for both the bar and table so there weren’t mis-matched chairs for dining. Thanks Catherine for this wonderful idea! We are always shifting around our island chairs to accommodate (4-6) people for dining while sometimes leaving them in a linear fashion for bar seating. Our island measures (14) feet long by (4.5) feet wide. As a tip, utilize this layout for your shotgun home or long linear kitchen, and I promise you’ll love the function so much more!
Now, let’s talk about aisle widths. In the same conversation about layouts, I’ve also seen this be the culprit of traffic jams in the kitchen. When approaching a new layout, I always try to keep at least (3) feet between my cabinets and island. If there are appliances, which is typical, I try to make this at least (3.5) feet. In our more luxury kitchens we extend this to (4) feet. It’s best to note, in our (4) feet aisle kitchens, they are usually for our larger homes, which often times consist of larger appliances.
Appliances
When considering your new kitchen design, you need to consider what appliances you’ll need. When designing on the high end, we use a double oven with a separate cook top in place of a standard range. This will allow the line of the countertop to pass through and provides a cleaner look. However, it’s not always practical so we find both options to be suitable. Next, we need to look at the hood vent. No matter what style you go with make sure you understand the cfm (amount of air) and volume. Most of our kitchens are adjacent to living and dining spaces making this all the more important. Full disclosure, our stainless-steel hood vent is terribly loud, and we literally apologize to our guest when cooking dinner. Please don’t overlook this small detail. You’ll thank me later! If your kitchen is really small, there’s limited cabinetry, or no island combine the microwave and hood vent. More often, we try to put the microwave in the island as it’s often across from the oven allowing for better function and easier access. Now, let’s talk refrigerators and freezers. My two favorite manufacturers are Sub Zero and Frigidaire professional line. These two will cover the spectrum from high end to mid-range. We have both in our home, and we couldn’t be happier. When choosing your refrigerator and freezer, consider using a counter depth for smaller kitchens. These are great, as they provide less crowding and a more modern look to your kitchen. My favorite product is a counter depth full fridge and freezer. These fit in many kitchens and provide a high end commercial kitchen look! If you want to elevate the look of your refrigerator, consider adding a trim kit to the top providing more height to your refrigerator cabinet.
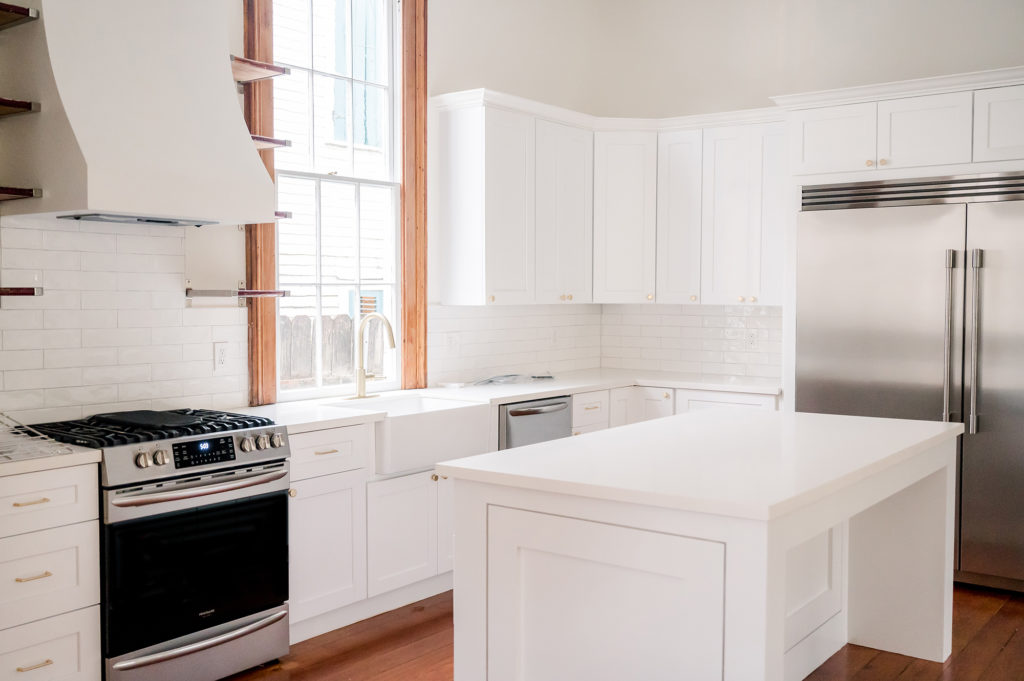
While we covered a lot of topics, I feel like we’ve just scratched the surface! I hope some of these tips and pictures help you along the journey of designing your kitchen or help’s assist in compiling your thoughts to give to your architect. The more you understand the better you can communicate allowing for a better design in your home!
NEW ORLEANS, LA architect - SPECIALIZING IN RENOVATIONS
BRAD MICHAEL architecture
architect for the conscious and inspired
follow along @bradmichaelarchitecture